In this tutorial, I am going to explain the basics of WPAS design and implementation workflow based on a mini project called "Give me a quote". This article is a multi-part tutorial which aims to explain and incrementally build "Give me a quote" app, focusing on best practices of WPAS development life cycle.
Before we start
I assume that you:
- have an active WordPress installation and can login as administrator.
- downloaded and activated WP App Studio plugin.
- joined a plan and have a valid development license
- have experience using spreadsheets.
- have some experience using WordPress.
- have zero or some experience using WP App Studio.
- have zero or some development experience.
Note: If you're using FreeDev API access, some elements of the design(form and a couple of other things) will not be implemented in the generated code.
What I want to do
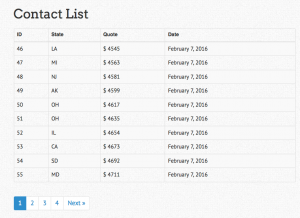
I want to sell my old car and decided to create a contact app to collect quotes from folks. Contacts are visitors who come to our "give me a quote" page and fill out the form. If I am lucky enough and get multiple quotes, I want to be able to pick the highest bidder and show his or her info on a page. The contact form will collect;
- First name. It will store text. Required. Filterable.
- Last name. It will store text. Required. Filterable.
- Email. It will store text and should be a valid email. I want people submit one quote from the same email. Required. Filterable.
- Mailing address(in case we want to ship the car). It's collection of;
- Street Address
- City. Filterable.
- State(two-letter state code). Filterable.
- Zip code. Required. Filterable.
- Phone number. I want to accept quotes from U.S only so it has to be a US phone. Required. Filterable.
- Best time to call back; morning, noon, or evening. Filterable.
- And off course the quote($). I will not accept values below $100. Required. Filterable.
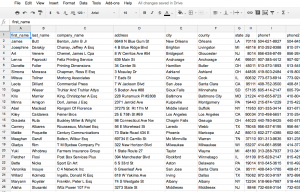
I also have some existing quotes that I have collected through the phone and email. I want to be able to import these to my new app as well.
What I need to do
To be able to do all of this, I need to:
- import the existing quotes and contact info into my new app
- collect new contact information
- store the collected contact information
- display the collected information
How I should do it
Well, let's start with the storing collected information. We need to store the contact info in a database and WordPress comes with one, .. or does it? Yes, it does. Database is the place that all the collected info will go and stay.
Does WP App Studio come with a database? The answer is yes and no. Yes, because it is part of WordPress so stores all the stuff in your app design in WordPress database. No, because it does not have a separate database. It is not relevant to our case because WP App Studio will create a plugin which will do the storing part for us and will not store the info itself. Just wanted to point out the difference between WP App Studio(WPAS) and the generated plugin.
Storing contact information
What do I need to complete this task in WPAS? The ones who answered "I need to create the app first" were correct. Yes, we need to create an app. I will name it "Request a quote" app. "Request a quote" will turn into a WordPress plugin which you will be able to download and activate, just like how you did with WP App Studio plugin.
Now, we need a place to store contact first name, last name etc. The info we are supposed to collect. As friendly reminder, this is the part we talked about "What I want to do(some people call this requirements)" section. What do we need for this? We need an storage place called entity.
Entities store information we care about. So let's click on "Add new" and create one called "contacts". We need provide 3 names; slug, singular, and plural of contacts. Ohh... click save as well, will you?
Pro tip: WPAS entities are implemented as custom post types and stored in wp_posts table of WordPress database. Attributes are stored in wp_postmeta table as meta_key/meta_value combinations.
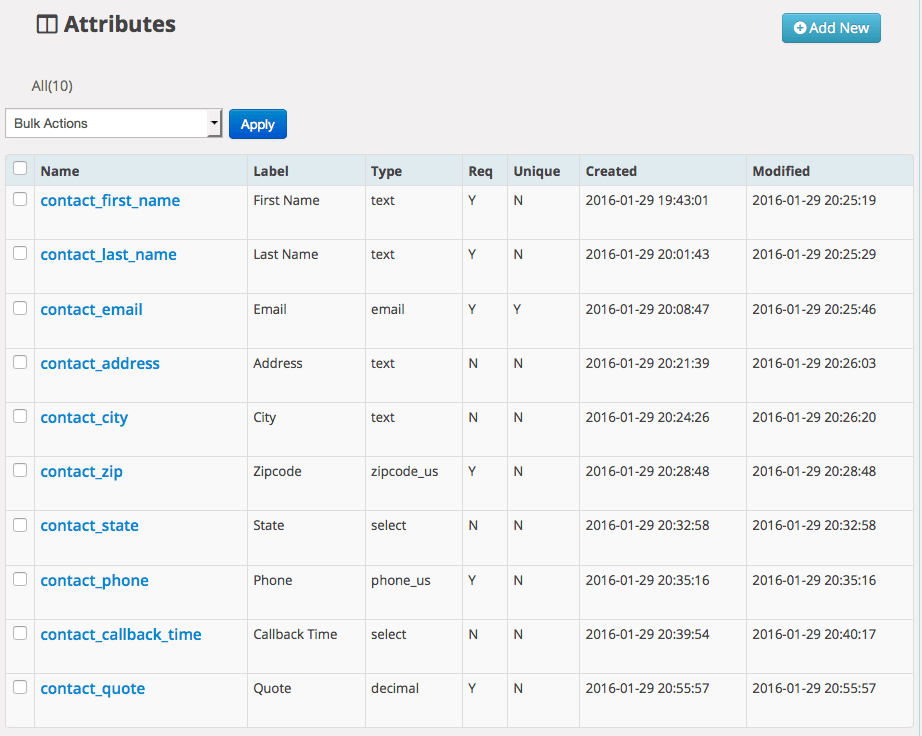
Now, we got an entity called "Contacts". Are we done? Not yet. Entities do not do anything for us, unless we define what they are all about. And we do that with attributes. Attributes give details of what the entity is going to store. So let's hover on the contact entity and click on "Add attribute" quick link or click on "contact" and click on "Add New" button.
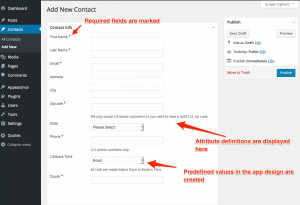
Let's start with creating "First name" attribute. Put in name, label, pick type "Text", and check "Visible in the admin list".
Pro tip: It is a best practice to prefix name of the entity an attribute belongs to when defining its name such as contact_first_name. Why? It will be easier to find this info in post_meta table if you have tons of plugins.
Let's go ahead and create the other attributes;
- last name; the same first name. Required.
- email; select "email" type since we want valid emails only. Let's make it unique as well since we do not want people submit multiple quotes from the same email. Required.
- address; text
- city; text
- zipcode; zipcode US. Required.
- state; Select with two letter state codes in the values text area, separated with semi-colon.
- phone; phone US. Required.
- Callback time; Select with morning, noon, or evening in the values text area, separated with semi-colon.
- Quote; Decimal with minimum of $100. Required.
Collecting contact information
We got our app, entity and entity attributes defined. The next step is to collect information from people. How do we do that? You guessed it right. We need to create a form. To be more specific; a submit form. We could have created a search form as well if we wanted people to see what other people quoted us.
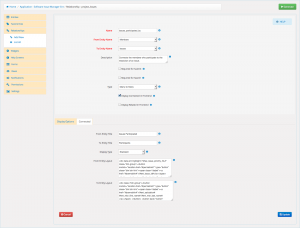
In order to create a submit form, go Forms menu and click "Add New". On the right hand side, put in "contact_submit" as the name, select "Submit" as type, attach it to "Contacts" entity, and click Save.
This will create a submit form for us. We're using the default form layout. The form field(attribute) order will be based on order of the entity attributes. If you'd like to change the order, just drag and drop the attribute to the location you want.
Pro tip: If you want to customize the form layout, click on "Edit Layout" quick link after hovering on the form name from the form list.
Displaying contact information
You know what...Let's skip this and trust WPAS to give us a default layout. If we wanted to create, a specific layout, then we would have created a View. Views are used to display the collected information on your site's frontend.
Wrapping up
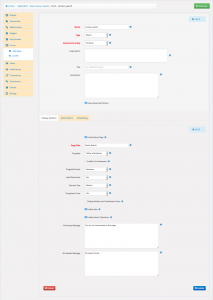
I think we are done designing the first iteration of our project. Let's go ahead and click on Settings menu > App info. We want to fill out the required(colored red) ones here. The info here will be used in coding and creating readme.txt file of our app.
The app name and text domain combo is exclusive to you meaning nobody can use the same combo. If you purchased ProDev account, your app name and text domain must match the ones you specified in the check out. Otherwise, you will end up will FreeDev version of your app. So double check these values not to unpleasantly surprised. See the screenshot for the values I put in.
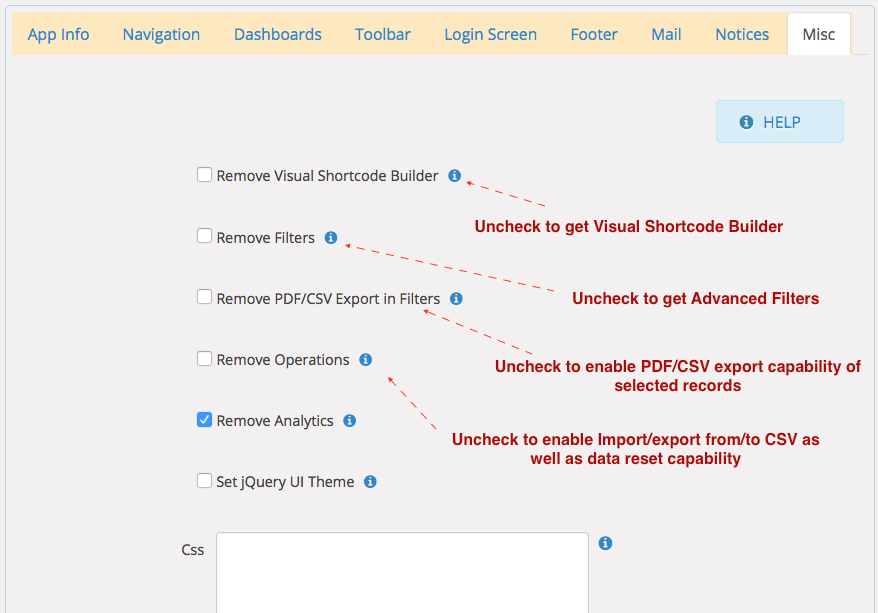
We also need to modify Settings > Misc tab to enable some features we want to use:
- Uncheck "Remove Visual Shortcode Builder" - to enable Visual Shortcode Builder
- Uncheck "Remove Filters" - to enable Advanced Filters
- Uncheck "Remove PDF/CSV Export in Filters" - to enable PDF/CSV export of the selected records
- Uncheck "Remove Operations" - to enable import/export from/to CSV
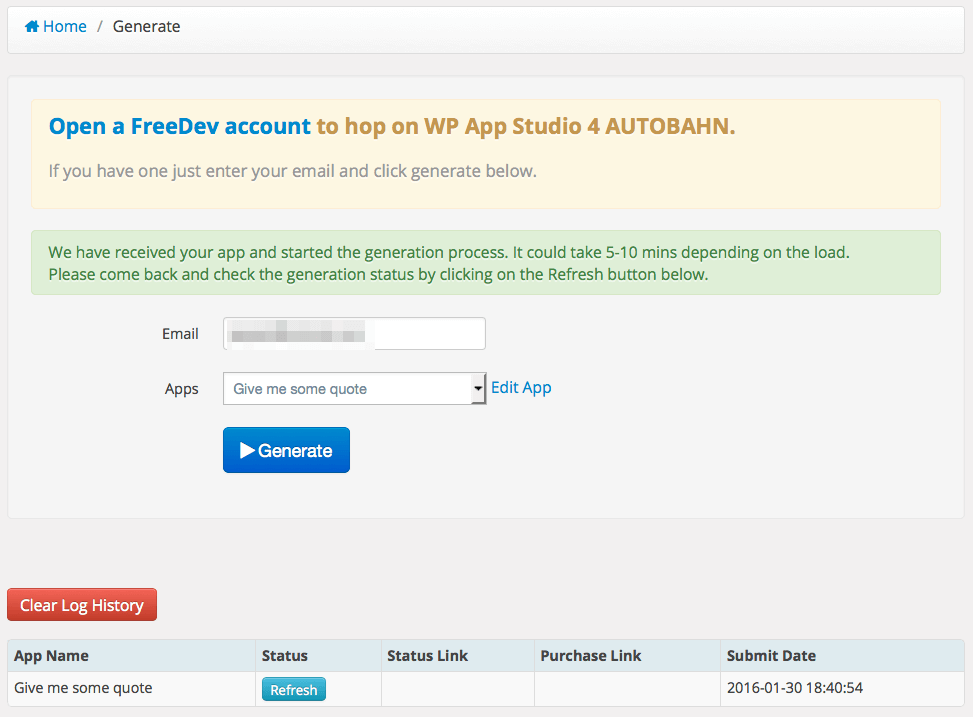
The next thing up is sending our design for code generation. The green button on the top right screen with get you to the generation screen. You must have a valid license to be able generate code for your design. If you've not registered and got your license key, you should join a plan and activate your license key in Licenses page.
The next click on the "Generate" button. If you got the green box saying that it will take "5- 10 minutes" to generate your app, you're good to go. Sit back and relax because you were able to finish the first version of your WPAS app. I said the first version because software development is an iterative process and you may need to revisit the design add, delete or modify things to make it better.
In the next article, we will download the generated app(plugin), install, and see what we ended up with.