I am sure you're excited to see what we ended up with after generating our "Request a quote" app. If you want to refresh your memory on how we designed the app, take a look at the first article.
Before we start
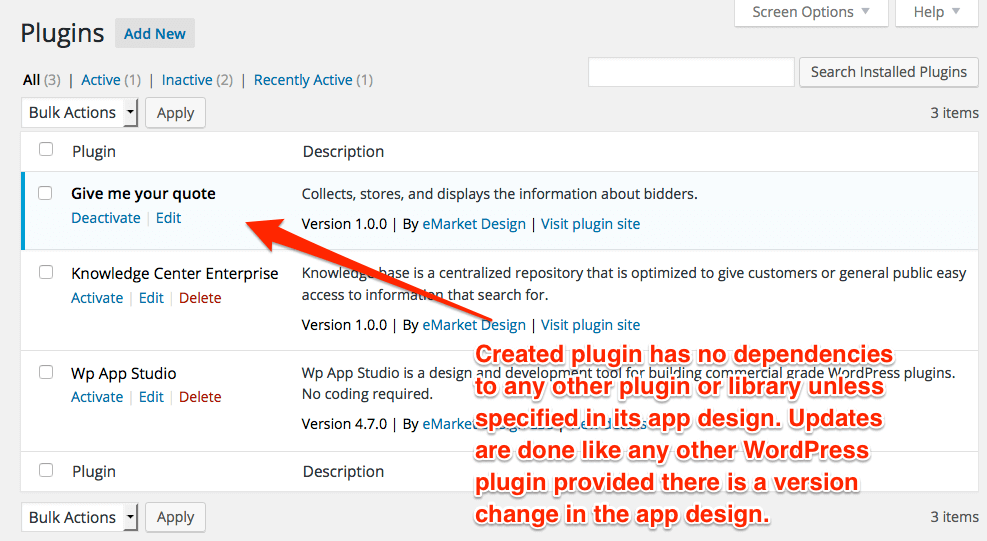
In this tutorial, I going to show what happened after I downloaded and activated our generated app. I assume that you:
- have an active WordPress installation and can login as administrator.
- have some experience using WordPress.
Anatomy of a WP App Studio app
WP App Studio apps are composed of two main areas;
- Frontend
- Backend
Frontend is the area where registered or non-registered users will see when they visit your site. WP App Studio(WPAS) views and forms are designed for the frontend of your site.
Backend is the area where registered users will see after they logged in to your site. Backend is the area that you can create, delete, or modify content. Once you publish the content, it becomes available to the public or to the users who can access to the content.
Let's start with backend
When you generate your app design in WP App Studio, every entity is implemented as primary menu item unless specified otherwise. Primary menu items are display in the left navigation bar. Entity plural name is used as menu title.
Navigation Menu
"Request a quote" app has only one entity so we have "Contacts" primary menu item. You can create a new record by clicking on "Add New" button.
Operations
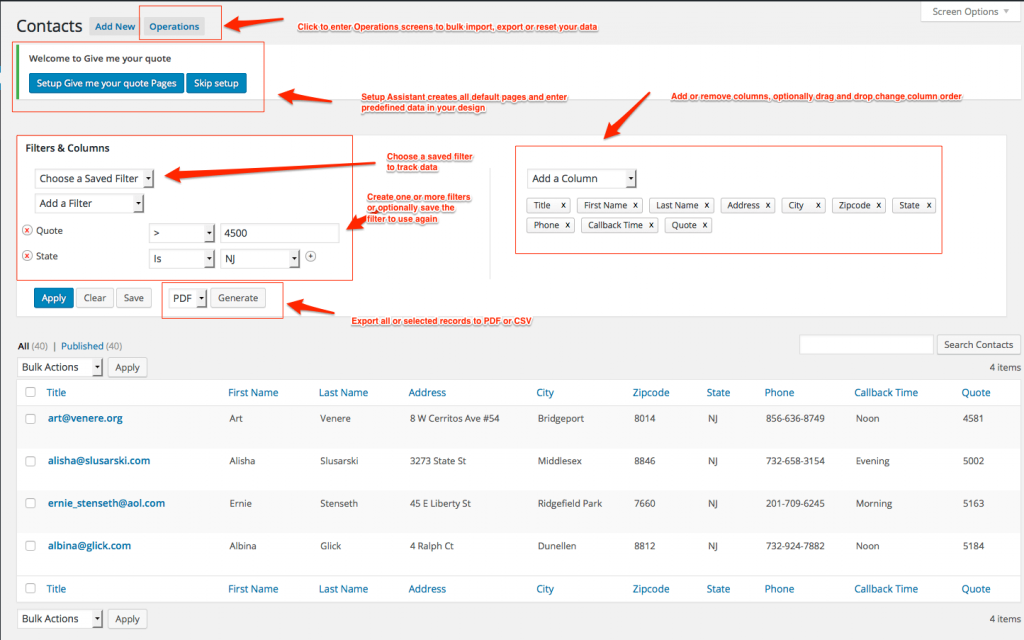
If you'd like to bulk import or export data from CSV then you need to click on "Operations" button. Operations button and screen are only accessible to administrators so if you want to bulk import/export, make sure you logged in as admin.
Advanced Filters and List
Advanced filters is the area that you can filter your entity attributes. Each entity attributes, we designed in our app is available as a column in this area unless we specified otherwise. Right below the advanced filters area, we see our contact list. Once contact records are created, they will show here.
Using the advanced filters, you can;
- Change the order of columns
- Add or remove columns from displaying in the list
- Create filters using one to many conditions. For example, you can create a filter displaying on only people living in 33180 zip code and quoted more than $3000.
- Save filters to see only content matching your criteria. Once you save a filter, it becomes available in a dropdown
- You can export selected records to CSV or PDF files if you enabled this feature in your design
If you noticed, we have also form name, form submitted by and form submitted IP fields added to our lists. These attributes are created by default and helps you differentiate how a particular record is created.
Edit Screen
Clicking on "Add New" button takes us the edit screen. Edit screen is the area to create a new record or modify an existing one.
As you can see on the image on the left, we have all entity attributes listed one after another based on the order defined in the app design. The required attributes are marked as red asterisk as well. The dropdown values are populated using the predefined list based on the attribute design.
Pro tip: You can change edit screen layout by clicking on "Edit admin layout" quick link when you hover on the entity name in your app design. Drag and drop interface allows creating tabs or accordions for grouping attributes if you have long list of attributes.
App Settings
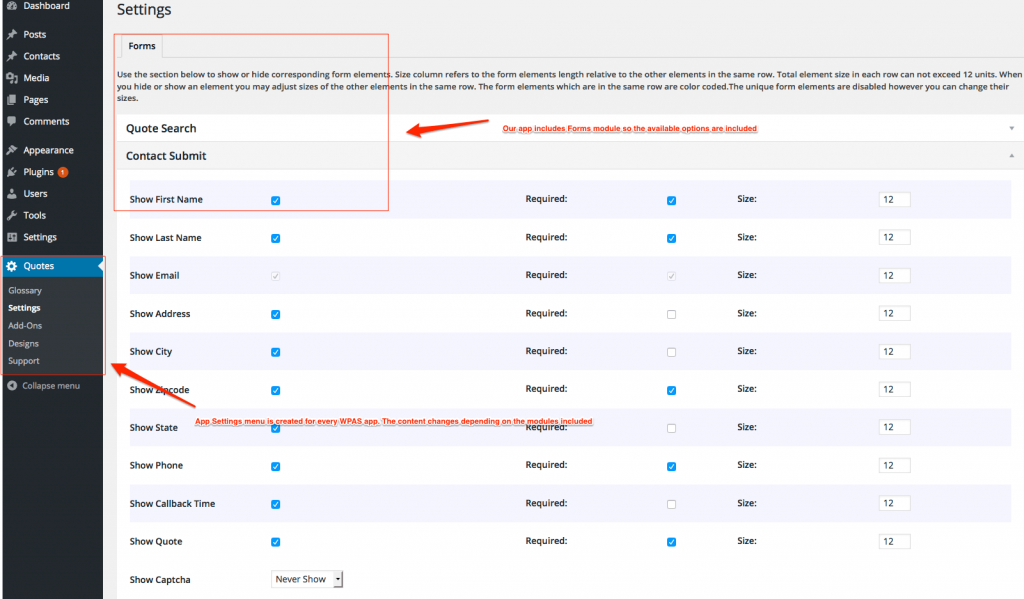
Every WP App Studio app comes with Settings menu. At minimum, app glossary is included to provide definitions of terms and business rules implemented within you app. The business rules set the conditions or constraints of some aspect of app behavior and always resolve to either true or false. For example, we set a rule that we only accept quotes over $100. If a bidder quotes us below $100, it is not accepted. The other menu items are added if specific configuration is needed.
"Request a quote" app has a submit form so form configuration page is included. The form configuration page is makes modifications for the frontend of your app only. Using form configuration, you can display/hide form fields, adjust form grid columns, set fields required or optional.
Wrapping up
In this part of the tutorial, we've covered the look and feel of of "Request a quote" app backend, focusing of different components implemented based on our app design. In the next article, we will go over the frontend of the default app and import some existing contacts.


