When you first install WP App Studio, it comes with Margarita app. Margarita app design produces a contact form. I will explain the concepts used in this app going through the main screens in the design and the generated app.
It is important to understand that WP App Studio is a development tool and learning a development tool comes with a learning curve. So if you do not understand something or see the screen with lots of menus and configuration options, do not panic. It becomes easier when you generate a couple of times and see the generated app based on your design.
I assume you were able to complete the first step; change the settings and was able to send the app for generation. If you did not, do it now to see the real plugin in front of you.
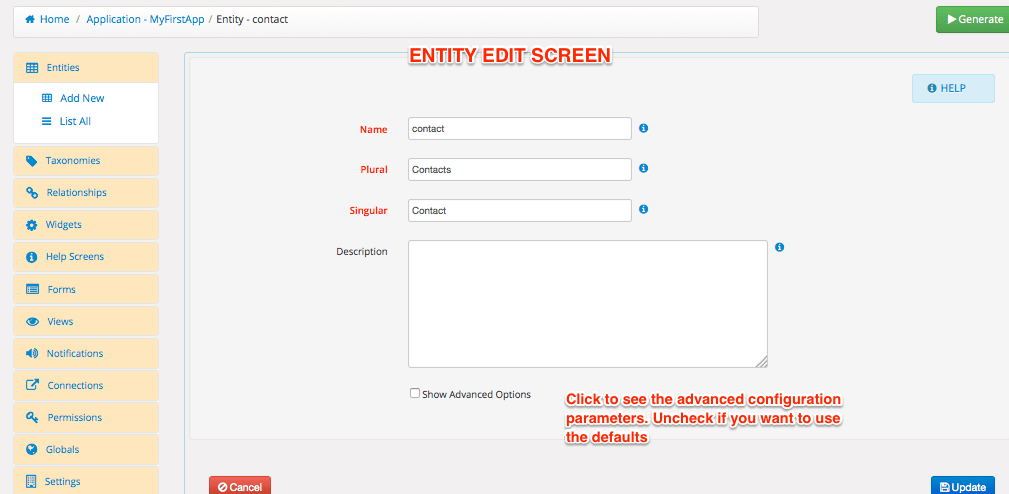
Entities
The FreeDev demo comes with two entities;
- Contact
- Basic Calcs
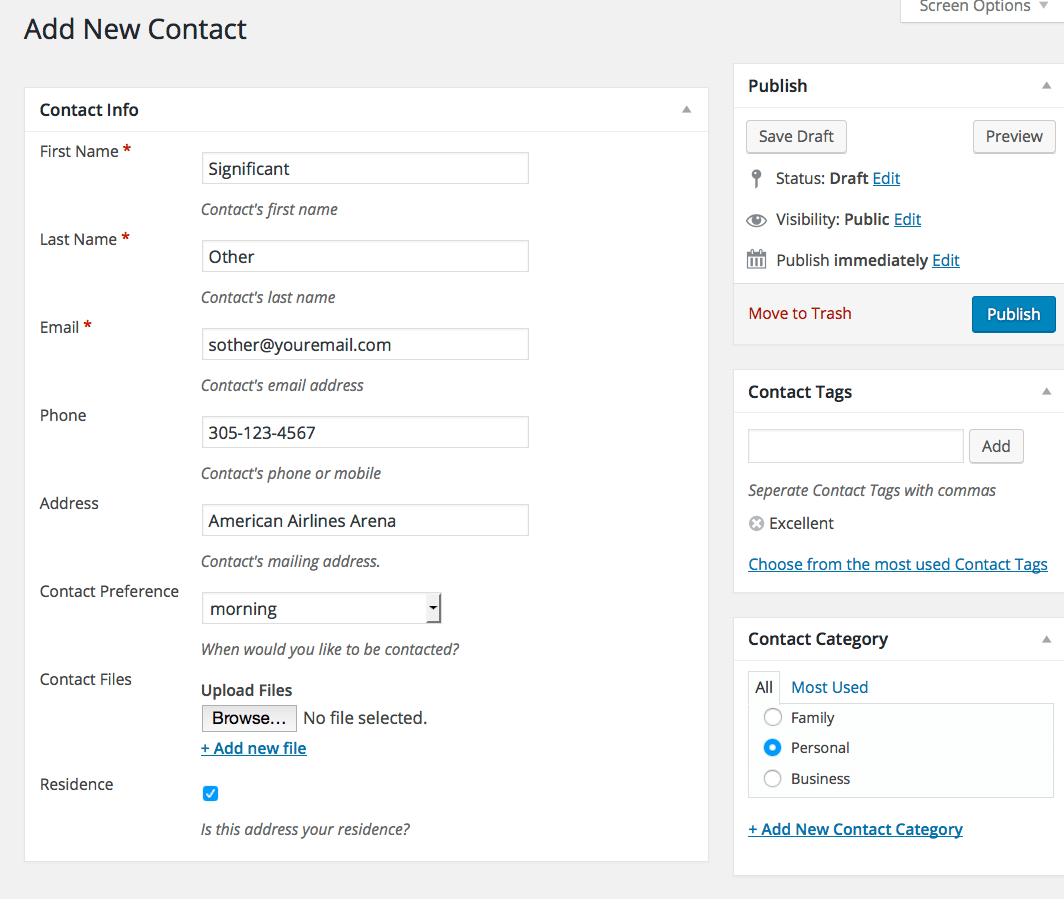
Entities define the things you care to store data about. For example, contact entity stores information about the contacts. It is very similar to what an address book does.
Entity Attributes
Attributes define the content that will be stored in your entities. WP App Studio supports many types of attributes to better classify your content and protects your app from incorrectly entered values. Incorrect and irrelevant values compromise your content's quality and may lead to confusion. For example, Contact First Name and Contact Last Name attributes define a contact record storing first name and last name of a contact.
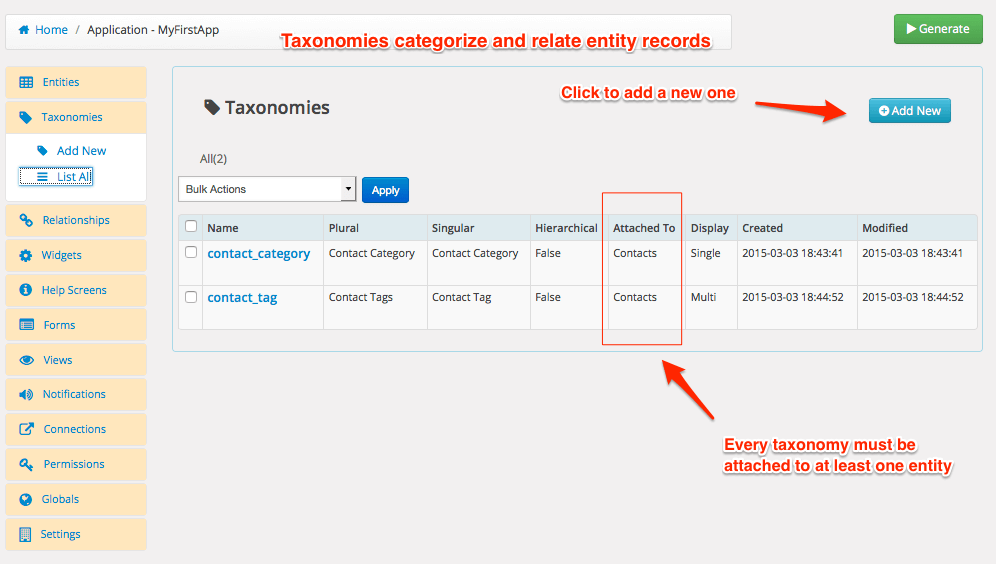
Taxonomies
Taxonomies categorize and relate entity records. For example, contact tags and contact categories taxonomies help you, you guessed it right, categorize and tag contacts.
Workshop
In this workshop, we will learn how to add taxonomies and attributes to an entity. Contact entity is missing Country, City and Zipcode fields. We want to add these fields so that we know the full address of a contact record. We will make country field a taxonomy since we want to have flexibility adding values and see the count of contacts by country. The city and zipcode fields will be attributes for simplicity purposes.
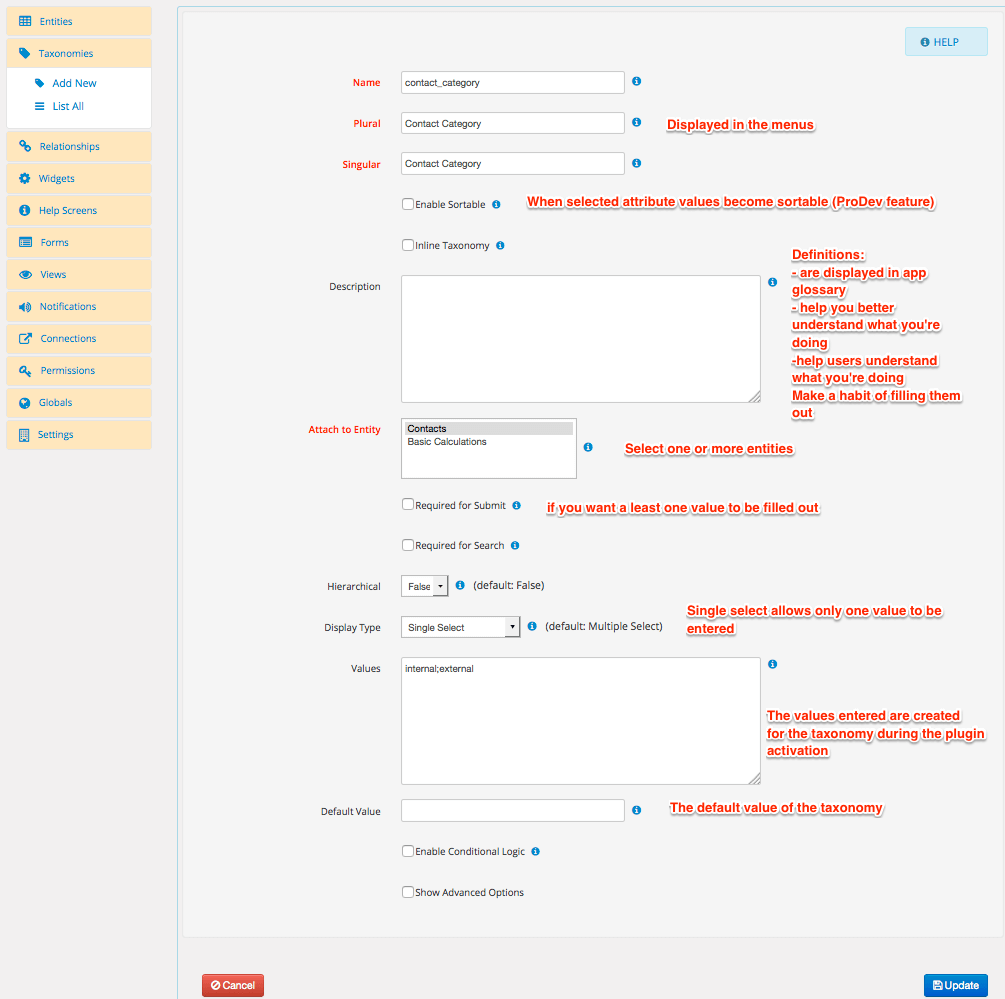
Adding country taxonomy
- Go to Taxonomy menu and click Add New while in the app edit screen
- Type in "contact_country" in the name field, "Countries" in the plural and "Country" in the singular field.
- Type in "Classifies contact addresses by country" in description
- Select "Contacts" from Attach to Entity field
- Select single select from Display type, since contact address can not be in more than one country
- Type in "USA;Canada;Mexico;E.U." for the values. These values will be pre-populated during the plugin setup
- Set the default value by typing in "USA"
- Click Save
Now, you will see "contact_country" in the taxonomy list
Adding city and zipcode attributes
- Click on Entities > List All and contact entity to see contact attributes
- Click Add New to add a new attribute
- Type in "contact_city" in the name field, and "City" in the Label field.
- Type "City that a contact resides in" in the description field
- Select "Text" from the type dropdown
- Click Visible in Admin List checkbox show it as a column
- Click Save
- Click Add New to add a new attribute
- Type in "contact_zipcode" in the name field, and "Zipcode" in the Label field.
- Type "Zipcode that a contact resides in" in the description field
- Select "Text" from the type dropdown
- Click Visible in Admin List checkbox show it as a column
- Click Save
Updating app settings
Although it is optional, it is a best practice to update App Changelog documenting the changes made and tick up the app version number.
- Click on Settings > Update
- Change the version number to 1.2.1 (or any number you like)
- In the change log field, type in "= 1.2.1 =" and for the next two lines type in " * Added Country taxonomy to Contacts" and "* Added City and Zipcode attributes to Contacts"
- Click Update
Generating
- While in the app edit screen, click Generate button on the top right corner
- Click Generate
Downloading and activating
- After waiting 2 to 10 mins, Click Refresh button while in the generation screen
- When the app got generated, you will see "Success" in the status column
- Click "Download FreeDev version" button to download zip file
- Go to the Plugins admin page and deactivate the old plugin if it is activated and click delete link
- Click Add New > Upload Plugin > Browse and find the zip file, upload and activate
Testing
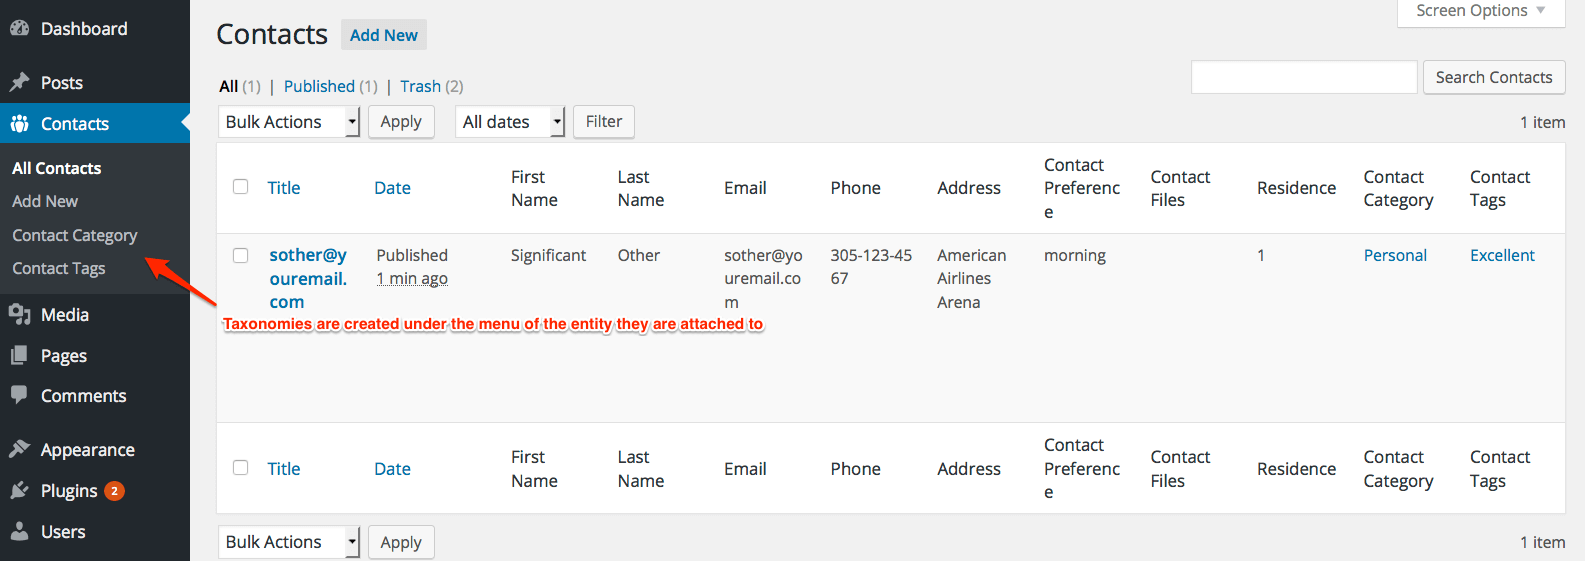
- Go to Contacts menu and see if Countries taxonomy added as link to the menu
- Click Countries link to see the country values added to the taxonomy list
- Click Add New from Contacts menu to add a new record
- Check if City and Zipcode attributes are created
- Check if Country taxonomy box is created
- Fill out all required fields and optionally all fields and click Publish
- Go Contacts List screen see the new contact created