An attribute is a property or descriptor of an entity. Each entity must have at least one attribute. Each entity also must have a unique attribute.
The following describes the attribute screen fields.
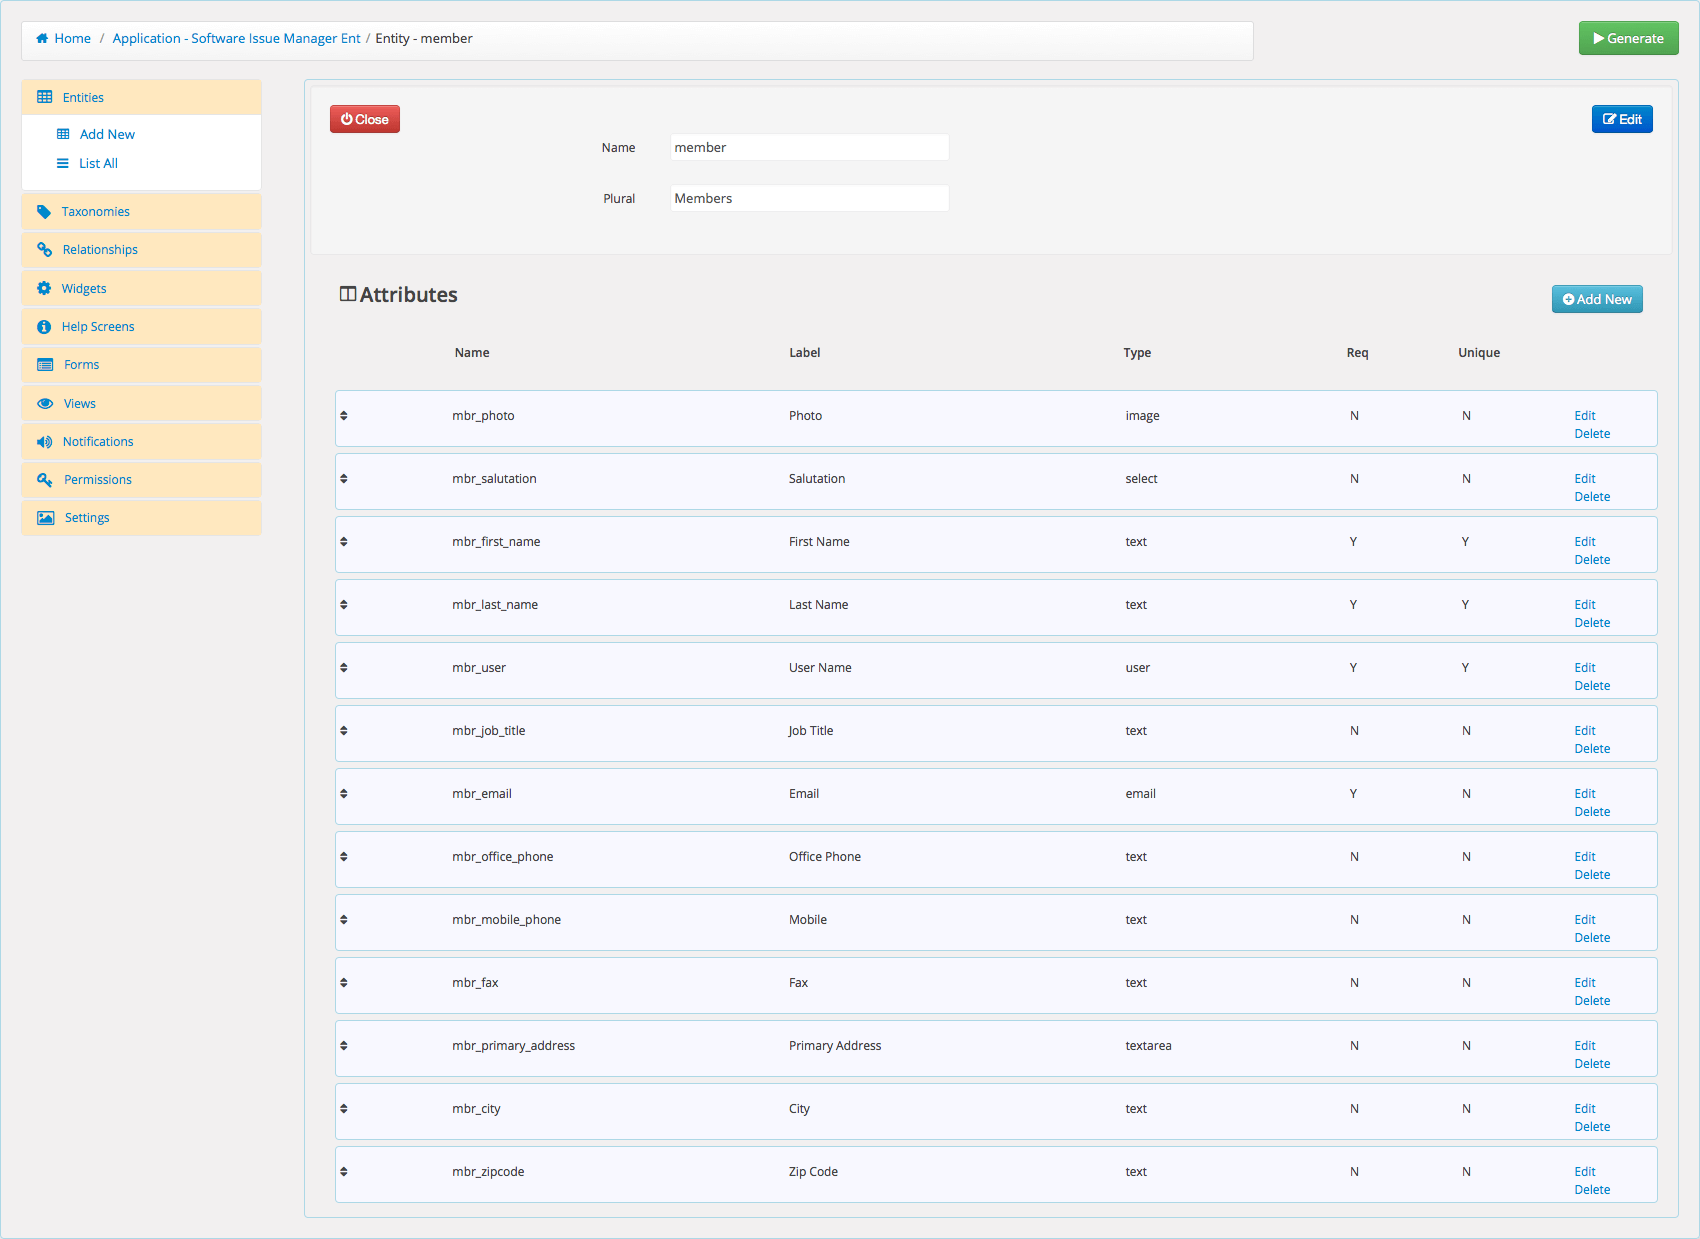
- Name
- General name for the attribute, single word, no spaces, all lower case. Underscores and dashes allowed.
- Label
- User friendly name for your attribute. It will appear on the EDIT page of the entity.
- Description
- Instructions or help-text related to your attribute.
- Required for Submit
- Makes the attribute required so it can not be blank when entering data.
- Required for Search (WPAS 2.2)
- Makes the attribute required so it can not be blank when searching data.
- Unique (WPAS 2.0)
- An identifier which is guaranteed to be unique among all identifiers used for those objects and for a specific purpose. Exp; VIN of a car uniquely identifies a car among other cars. A unique identifier is used in forms as a searchable dropdown to link related entities.
- Filterable
- Makes the attribute filterable in admin list page of the entity.
- Default Value
- Sets the default value(s) for an attribute, separated by a semicolon. Multiple default values can only be set for select with multiple option and checkbox list types.
- Type
- Defines the attribute display and validation type.
- Formula (WPAS 4.6.0)
- Enter the formula to be used in the calculations. Make sure to use only attributes available and functions supported defined by their parameters. You do not need to wrap strings with quotes.
- Return Type (WPAS 4.6.0)
- Enter the data type which will be returned as a result of the formula above.
Some of the attribute types are below;
- Makes the element require a valid email.
- URL
- Makes the element require a valid url.
- Decimal
- Makes the element require a decimal number.
- Digits Only
- Makes the element require digits only.
- Credit Card
- Makes the element require a creditcard number.
- Phone US
- Makes the element require a valid US phone number.
- Phone UK
- Makes the element require a valid UK phone number.
- Mobile UK
- Makes the element require a valid UK mobile phone number.
- Letters with Punct
- Makes the element require letters with punctuation.
- AlphaNumeric
- Makes the element require alphanumeric characters.
- Letters Only
- Makes the element require letters only.
- No WhiteSpace
- Makes the element require no whitespace.
- Zipcode US
- Makes the element require a valid US Zipcode.
- Postal Code UK
- Makes the element require a valid UK Postal Code.
- Integer
- Makes the element require an Integer number.
- VIN Number US
- Makes the element require a valid US VIN number.
- IP Address V4
- Makes the element require a valid IP Address V4.
- IP Address V6
- Makes the element require a valid IP Address V6.
- Date
- Makes the element require a date and displays a calendar.
- DateTime
- Makes the element require a date and a time and displays a date and time entry box.
- Time
- Makes the element require a time. and displays a time entry box.
- Text
- Displays a textbox. You can make the element require minimum or maximum characters in the content.
- Text Area
- Displays a textarea. You can make the element require minimum or maximum characters in the content.
- Wysiwyg Editor
- Displays a Wysiwyg Editor.
- File
- Displays a file uploader
- Image
- Displays an image file uploader
- Plupload Image
- Displays an image file uploader with drag and drop functionality.
- Thickbox Image
- Displays a Thickbox image file uploader.
- Color Picker
- Displays a color picker.
- Hidden
- Enables a hidden attribute.
- Password
- Displays a Password entry field.
- Checkbox
- Displays a checkbox.
- Radio Button
- Displays a radio button.
- Map(WPAS 4.5.0)
- Displays a map with additional attributes.
- Calculated(WPAS 4.6.0)
- Displays a calculated attribute defined by its formula.
- Select
- Displays a dropdown. You can enter the initial values in the studio.
- Select Advanced
- Displays a dropdown with advanced funtionality such search. You can enter the initial values in the studio.
- Multi Select
- Displays a multi select dropdown. You can enter the initial values in the studio.
- Checkbox List
- Displays a checkbox list. You can enter the initial values in the studio.
- Allow HTML (WPAS 4.0)
- Allows html tags to be entered. When unchecked html tags are escaped.
To create an entity attribute
- While you are in Edit Application screen, click on the Entities tab.
- Click on the List All Entities link, click on the entity you want to add attribute to.
- Click Add Attribute link. To view All Entity Attributes click on any entity's name on the list.
- Fill in name, label, and description fields.
- Check Required checkbox if the attribute must have a value.
- Check Filterable checkbox if the attribute can be used in the filter dropdown of entity list.
- If there is a default value for the attribute, enter the value in the default value box.
- Select your attribute type and fill in the associated validation method fields.
- Fill in the attribute type specific configuration parameters; refer to the tooltip for definitions or help.
- Click Save button.