A newbie intro to WordPress development using WP App Studio – Part I
This article offers a newbie introduction to WP App Studio for those who have not created an app yet.
We are going to continue exploring the generated plugin focusing on the frontend and data import/export capabilities.
"Request a quote" app supports entity operations module since we enabled this feature in the app settings. If this module is enabled, WPAS creates an "Operations" button in app list screen next to the "Add New" button in the admin area. You must be logged in as administrator to access Operations screen.
The operations module is specifically designed for the generated app based on the app design and enforces data integrity by;
That's why using third party CSV importers is not recommended since they lack the logic to properly import your data compromising data integrity of your app.
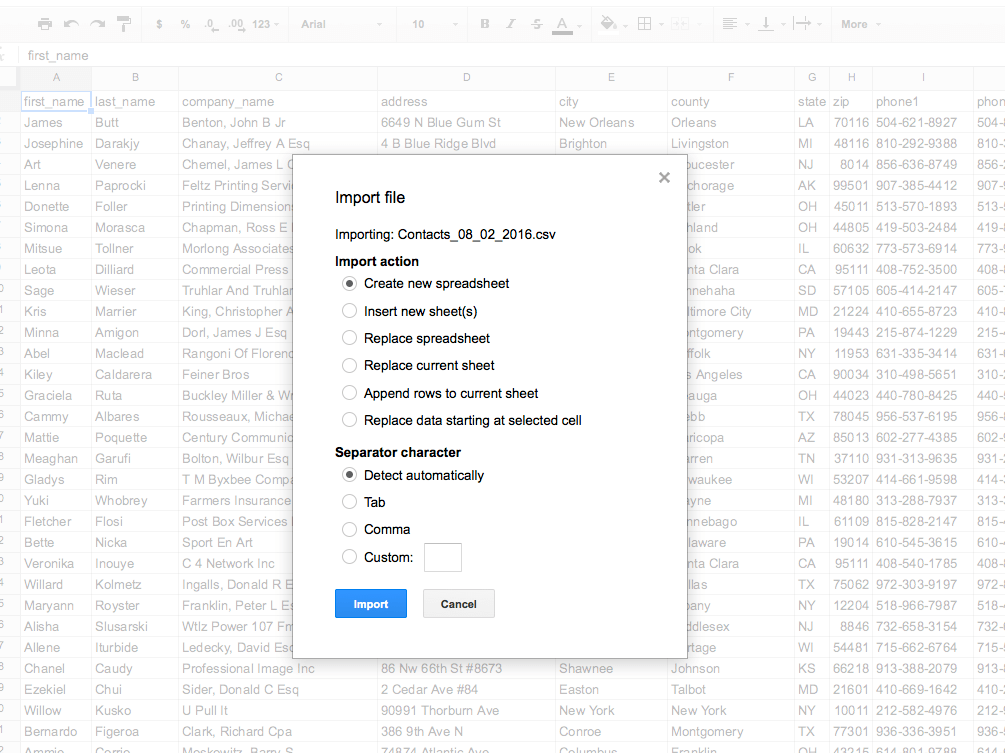
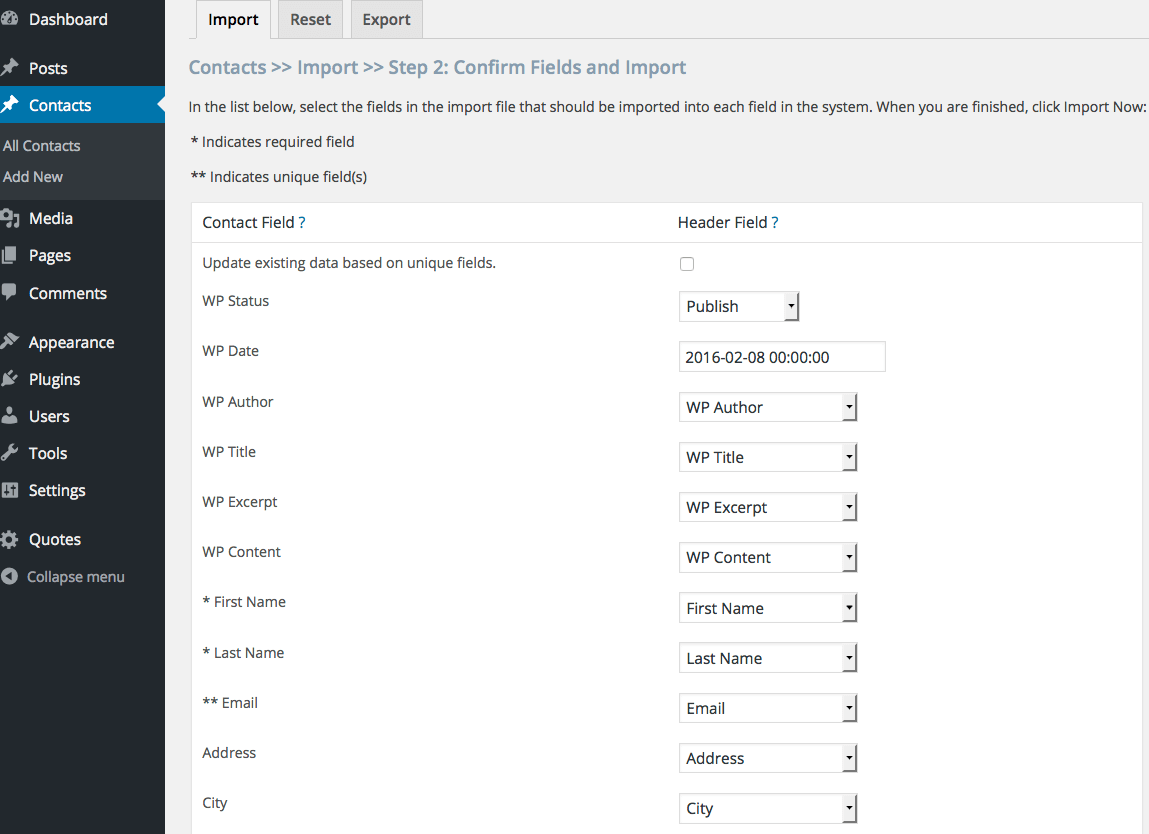
One of our requirements was to import existing quotes we collected from a CSV file into the app. The most efficient and error-free way to do this using Google Docs Google Spreadsheet(GS). WP App Studio apps support the GS CSV file format. GS is part of Google Docs, free and easily accessible with a Google account.
Once you have your data in GS, you can modify the content in a spreadsheet format. I will start by manually entering a couple of records so that I can export app template after with some sample data . The exported file matches what the import process expects so it will be a lot easier to match the columns etc.
The recommend process for bulk imports:
Pro tip: If you exceed the PHP upload limit and you do not want to/can not change php.ini file, try splitting the import file
Watch out for date or time attributes, the format of these attributes is very important. If you do not insert the required format, the data will not be displayed properly. Another issue is the usage of comas within strings. Make sure the data points with coma inside are wrapped with double quotes.
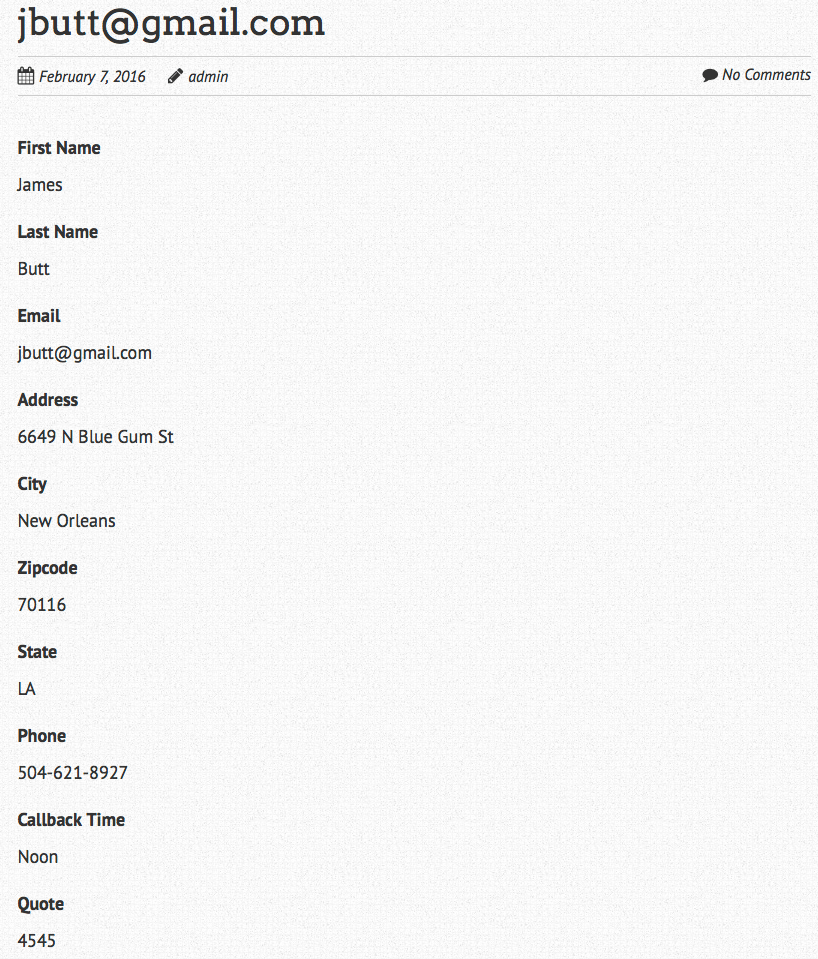
Single views are designed to display single records. If you do not specify a custom view layout, WPAS creates a default layout. The default layout lists attribute label value combinations one after another excluding hidden attributes, based on the attribute order.
Pro tip: In a more complex case, you may want to create a single view with a custom view layout. You do not have to know how to code in HTML. You can use any post or page visual editor to create the outline of your view layout. After creating the layout, just put the app tags you need to the places you want.
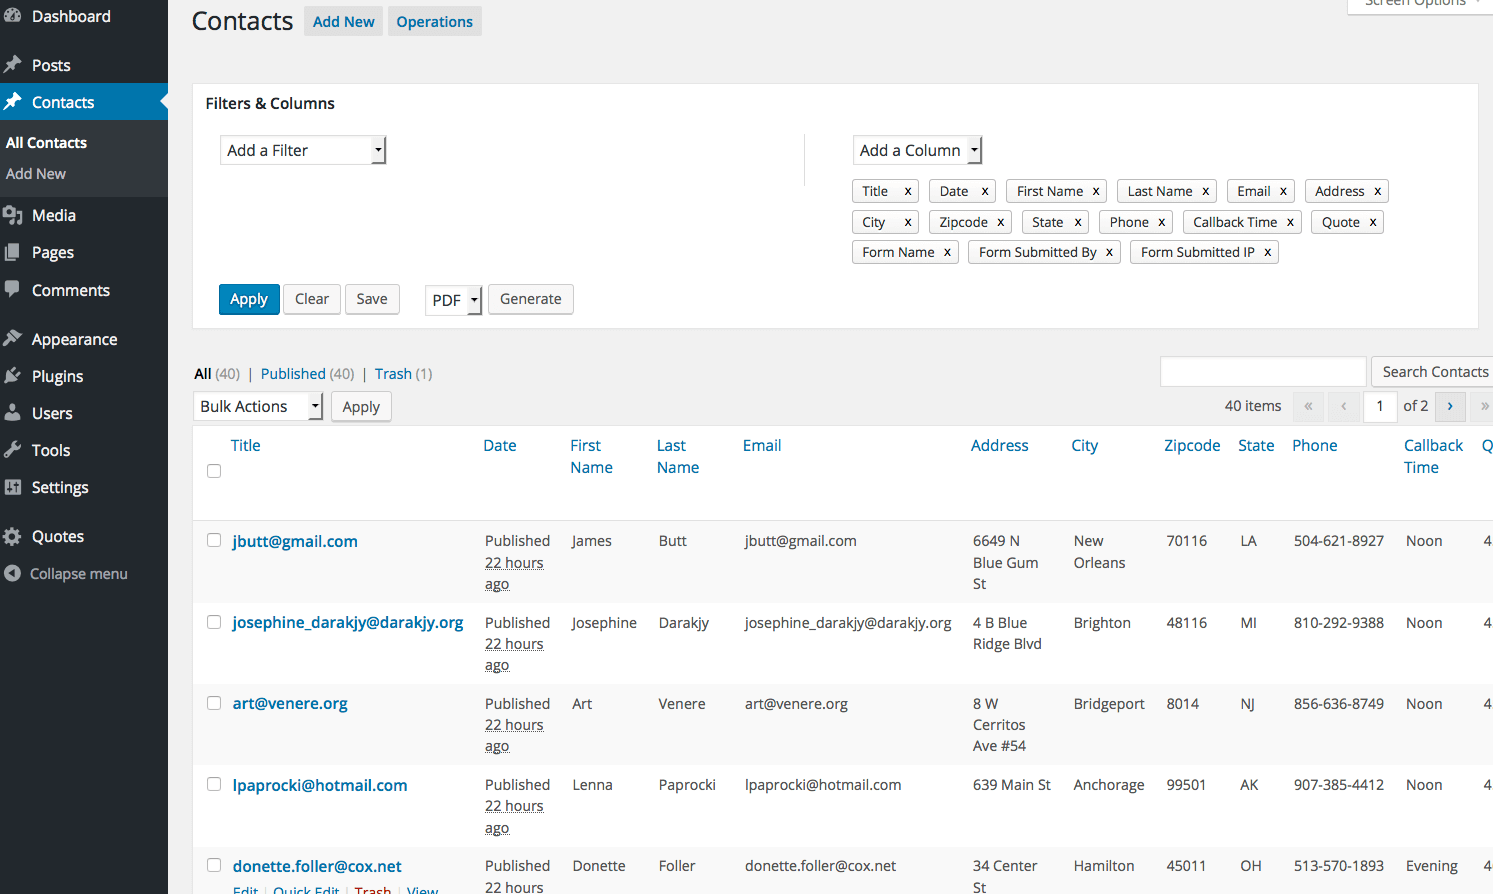
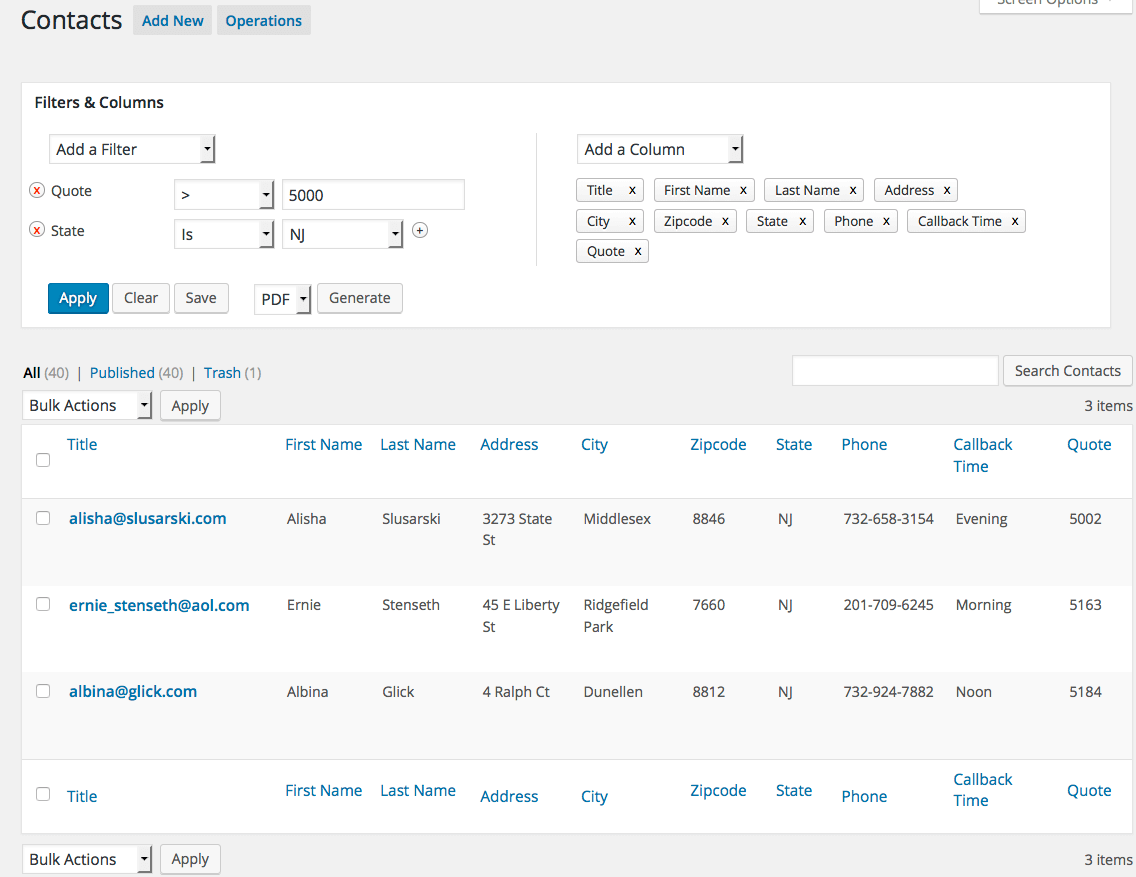
Since we uploaded some data, it is better now to show how advanced filter module helps us. Advanced filters is a powerful module which, you guessed it right, allows to filter out the data based on some criteria. For example, if I want to find out the bidders living New Jersey who also quoted me for more than $5000 for my car, I can create a filter for that.
In addition, if I want to track this criteria over time, I can save the filter. This feature allows me to see if the number increased, say a week from now without recreating the same criteria.
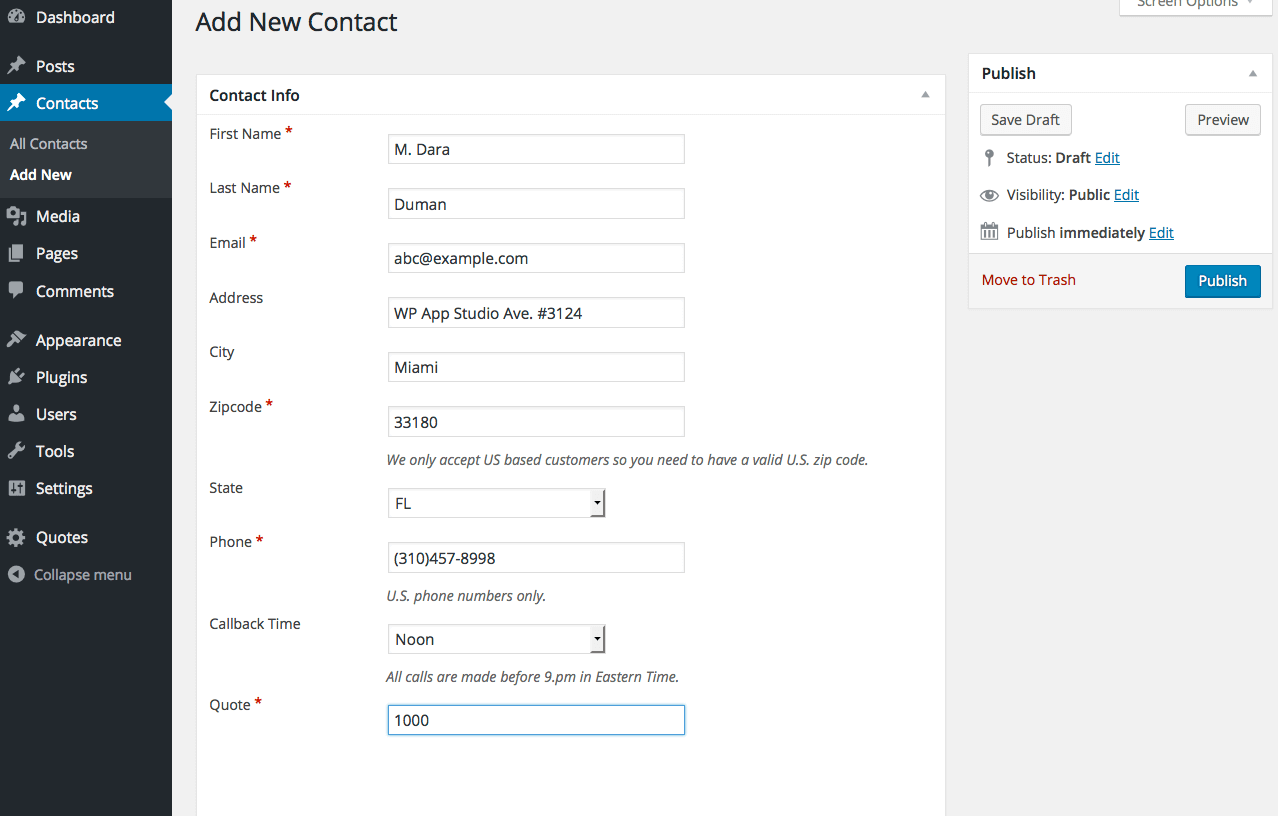
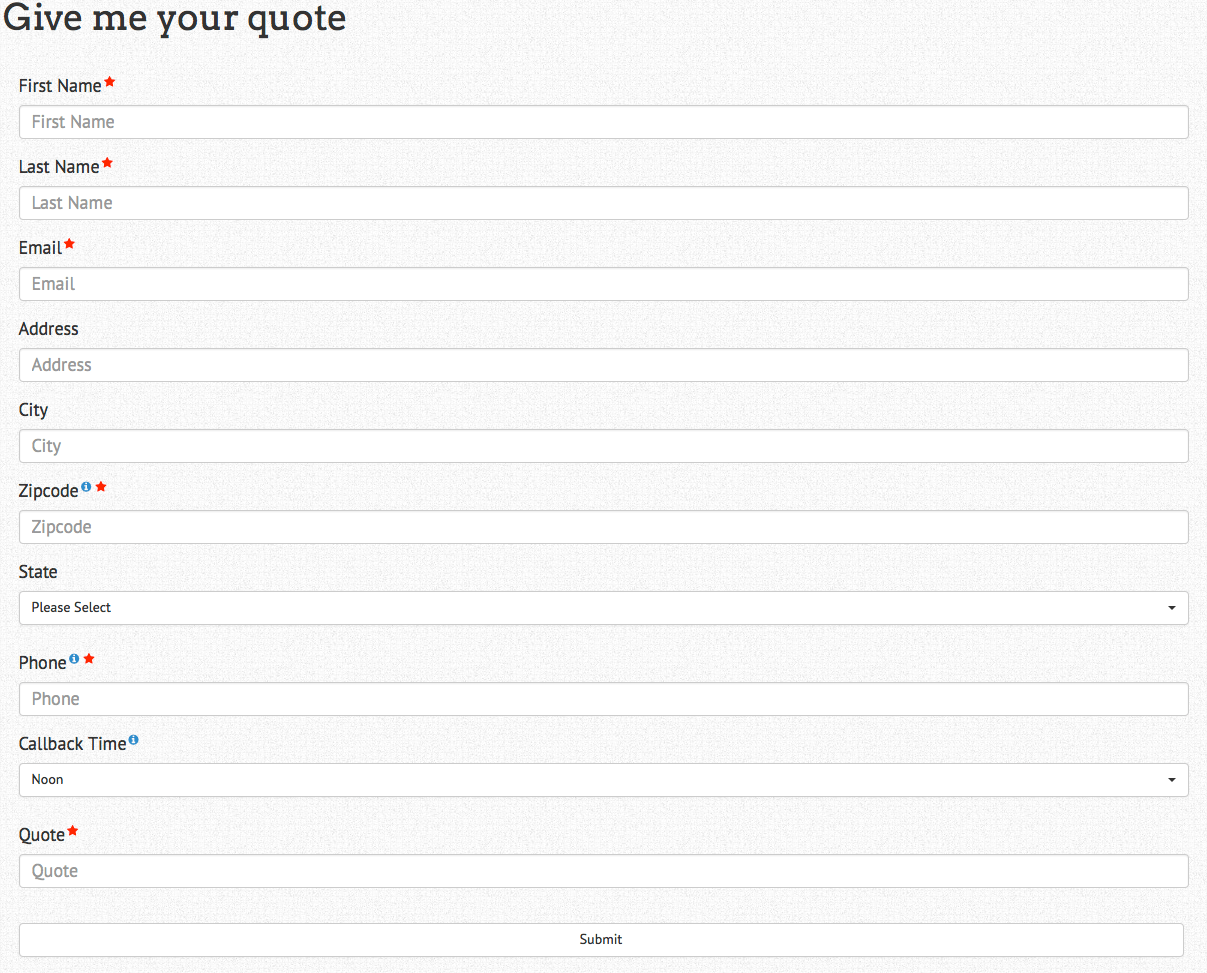
There are two types of forms in WPAS; submit and search. We did not create a search form for our app deciding to use Advanced Filters in the admin area instead. However, we created a submit form to collect quotes from the bidders.
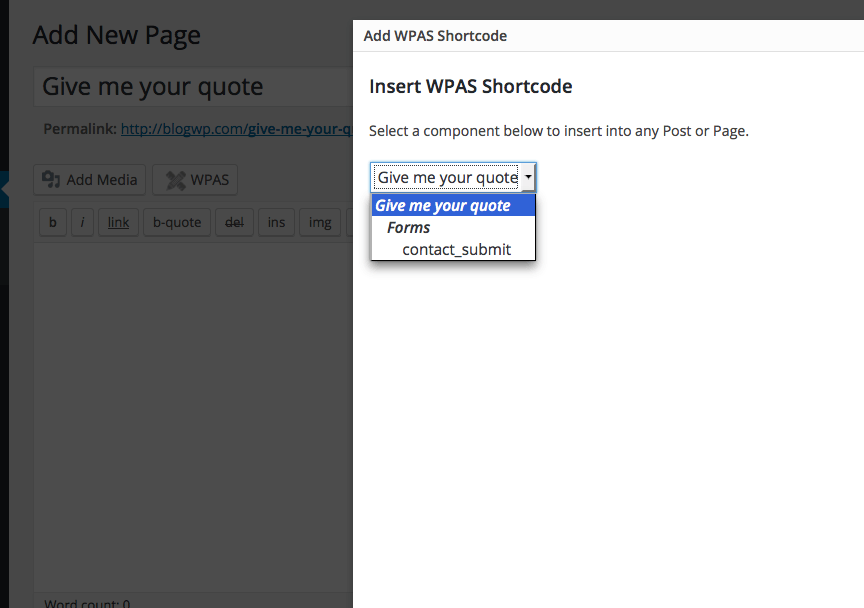
Every WPAS form comes with its own shortcode. If you put this shortcode in a page, WordPress renders the form. Let's think about a complex app with 20+ forms. How are we going to remember every shortcode? Well, good news! You do not have to. Since we enabled Visual Shortcode Builder(VSB) in the app design, it is available for our app.
Visual Shortcode Builder allows us to create simple as well as complex shortcodes. A simple shortcode is the one without any parameters such as our contact form. A more complex one may have one to many parameters such as filtering attributes, taxonomies or relationships limiting the results to certain post ids. VSB can be accessed by clicking on the WPAS button any page.
In this tutorial, I covered the very basics of a WPAS app. If you noticed, we did not write a single line of code, simply used the defaults. It is not the case for most commercial apps. As you learn more about WPAS WordPress development, you will more and more use custom HTML and JavaScript to enhance look and feel as well as functionality of your apps.
One way of learning how complex apps are developed is checking out at the available app designs. App designs allow us to document app requirements as well as simplifying how the generated code is structured. They are a great abstraction level for non-developer users. You can use app designs in your client walkthroughs or revisit how you developed a particular app.
In the upcoming tutorials, I will show creating more complex apps; adding a couple of taxonomies, relationships, and more sophisticated views.